Building a Room
This tutorial assumes that you’ve successfully installed and set up MOHRadiant and have all the path information set correctly. This tutorial also assumes that you have no previous experience editing Quake Levels
Section 1: Intro to brushes and the camera
Brushes are the building block for worlds in Quake engine games such as MOH. Brushes can only be convex shapes. In order to build a concave object you will use multiple brushes. This is for efficient collision detection in the game.
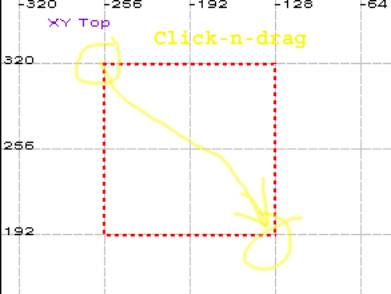
To create a new brush simply drag a box in the 2d view like this:
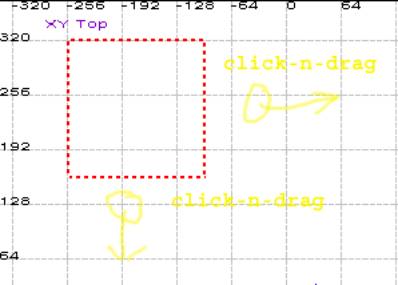
Now pull the edges out by clicking outside of the box and dragging outward.
When you’ve got the box in the shape that you want press the escape button. Notice the brush is no longer highlighted.
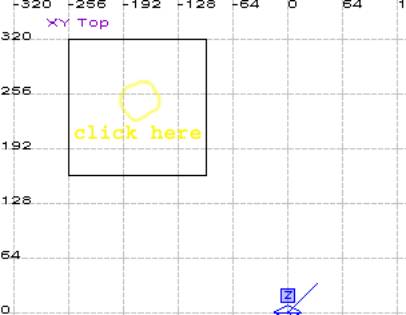
To select a brush for modifications, hold down shift and click in the center of the brush. You can also deselect a brush the same way. Pressing escape deselects all of the selected brushes.
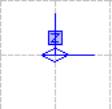
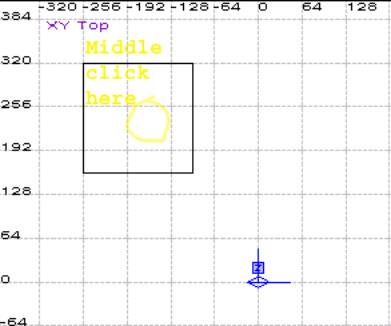
This is basic brush manipulation. Now you’ll learn how to focus the camera on the brush. This is the camera:
If you can’t find the camera scroll the 2dmap around by holding the right click and moving the mouse. Use the Mouse-wheel to zoom in and out. If you don’t have a mouse wheel use the insert and delete keys. Pressing Alt+x will center the 2d view on the current selected brush. Since you don’t have any brushes selected pressing Alt+x will center the 2d view on the camera.
Notice the two lines coming out of the camera. These lines show the camera’s field of view. You can point your camera by middle-clicking in the 2d view.
Notice your camera’s Field of view lines change.
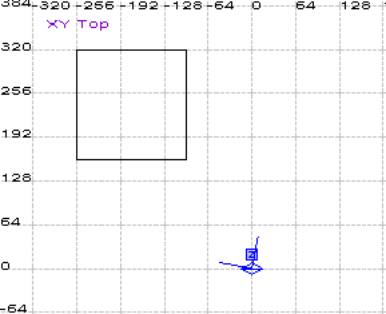
And your 3d view is now updated.

If at any point your camera is off looking at gray (void) space you can reposition it in the 2d view.
You’re going to control your camera mostly within the 3d view but when starting a map it’s easiest to first position the camera in the 2d view. Now you’ll move on to 3d camera manipulation.
There are a few different camera modes they can be selected by clicking on the camera eye icon in the tool bar. Click on it and watch it cycle through the different modes.
![]()
![]()
Default mode with the eye and no numbers is classic Q3 Radiant mode. Those who have used Q3radiant will be familiar with the camera controls in this mode.
![]()
The mode with a “1” over the eye is “game mode” and requires button rebinding to work.
![]()
The mode with a “2” over the eye is the “mode with no name” mode and this is the one I will use for this tutorial since it’s the one that I prefer.
In the 3d view click and hold your right mouse button, now move the mouse around and see what happens to the camera. Forward and back move the camera forward and back side-to-side turns the camera view from left to right.
Now hold down the control button and the right mouse button while moving the mouse. Moving up and down will move the camera up and down moving side-to-side will strafe the camera.
Hold down the control button the shift button and the right button and move the camera around. This will be like looking around in the game
If your ever lost in the gray void you can re-position your camera in the 2d view by CTRL+MIDDLE clicking. Combine that with the middle click to point the camera and you can quickly set your camera anywhere.
You can edit within the 3d view the same way that you edit in the 2d view. Just Shift-click the brush to select and pull away from edges. When you want precision or just plain ease of use you’ll edit in the 2d window.
To edit 3d geometry you’ll need to switch sides in the 2d view. Notice the words “XY Top” in the top left corner of the 2d view
Select the brush and Press CTRL+TAB to switch the 2d view to a different side. When the view switches it will center on the current selected brush or brushes. If nothing is selected the 2d view will center on the 3d camera.
Now you’re looking at the front view and it should look something like this:
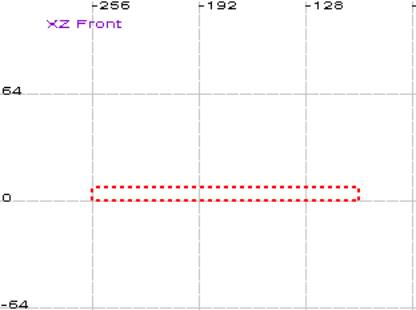
Click and drag the edges as you did earlier in the tutorial to make the brush taller.
Section 2: Hollowing a room
Now that you’ve learned the basics of brush and camera manipulation you can build a room. Go to the file menu and select New. If it asks you to copy the selection click on no.
Start by making your grid size 128 units, do this by pressing the “8” key. Notice the status window changing at the bottom of the window. It should say “Grid 128”. The numbers 1-9 change the grid size 1=1, 2=2, 3=4, 4=8, 5=16 etc.
Switch your view to the top view.
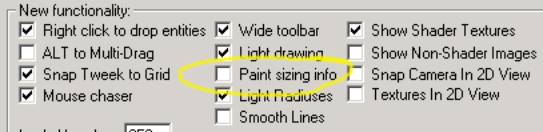
Draw a box that is 512 x 512 units. You can use the grid numbers on top and on the side or you can go by how many times the box “snaps”, each snap being the distance of the grid size. An easier way to measure a brush is to check the “paint sizing info” box in the preferences dialog box. Find the preferences in the “edit” menu.
You’ll now see the measurements on the selected brush or brushes.
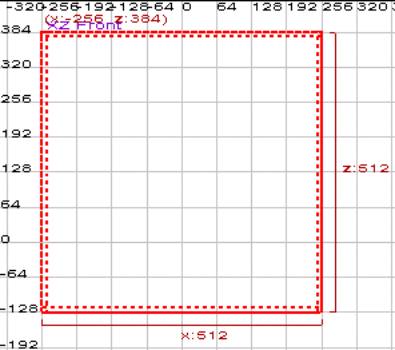
Stretch the brush out until you see this:
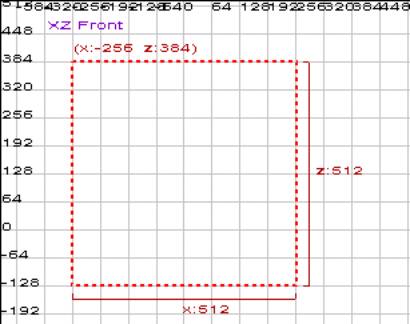
The numbers on the bottom and right sides are the size of the box; the number on the top is the coordinate for the top left corner.
Switch you’re 2d view (CTRL+TAB) and make the brush 512 units tall.
Now change the grid size to 8 (press 4).
Press the “hollow” Icon that looks like this:
![]()
Your brush will split into 6 brushes and looks like this:
This is the quick and dirty way of creating a room and is fine for this example. In creating buildings and such you’ll never use the hollow tool because the hollow tool doesn’t layout the brushes properly. At each of the edges the brushes overlap. For this example that’s fine because you won’t see the sides of the brush that overlap, but in a level where this room might be visible from outside this will create a problem because two surfaces will be on the same plane.
Move the camera inside the box (CONTROL+MIDDLE CLICK in the 2d view)
Now the room needs a texture. Go to the Textures menu and select barrel. I’m using Barrel for the tutorial because it’s the smallest texture directory and loads quickly.
You should see the texture window to the right of the screen fill up with barrel textures. Chose a texture to place on the wall and left-click it. This is the room, all it needs is a player start position and a light to run it in the game.
Section 3: Adding a player start and a light
First deselect everything (press Escape).
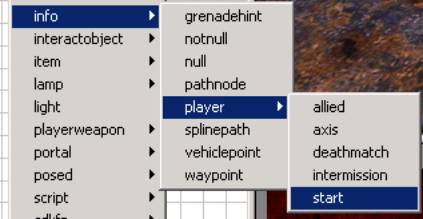
After deselecting everything right Click in the 2d window to bring up the entity selection menu. The menu looks like this:
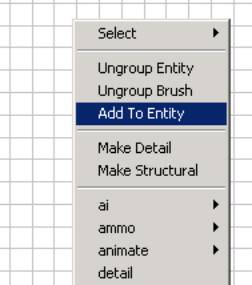
Select Info>Player>Start:
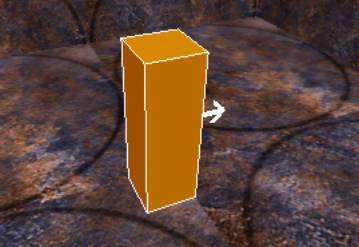
This places a player starting position where you click. Now you’ll rearrange that entity. In the 3d view turn the camera so it’s looking at the ground. Now hold CTRL+ALT and middle click in the center of the ground surface in the 3d view.
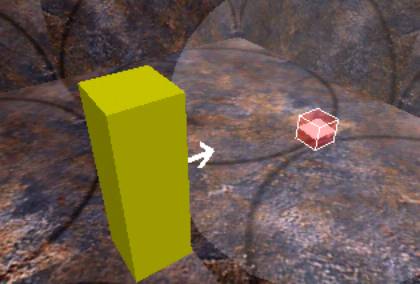
Deselect the player start position (press Escape). Right-Click in the 2d view and select “Light” from the menu. Place the light in the 3d view the same way as you placed the player start. You should end up with something that looks like this.
Save this level and you’ll be ready to compile and play in the game.
Section 4: Compiling and playing
Compiling is a 3-step process. BSP, VIS, and LIGHT
Q3map is a command line utility that is used to compile BSP and VIS the map.
Open a command prompt and run q3map like this
Q3map –gamedir <base directory of the game> <name of the map>
On a machine with MOHAA installed to c:/mohaa and the map named tutorial.map placed in the c:/mohaa/map_source directory the command would look like this:
Q3map –gamedir c:/mohaa c:/mohaa/map_source/tutorial
This compiles the BSP for the map
Compiling Vis is much the same way but with a –vis command attached like this:
Q3map –vis –gamedir c:/mohaa c:/mohaa/map_source/tutorial
Compiling Light is done with a separate program called mohlight; mohlight is run much the same, like this:
Mohlight –gamedir c:/mohaa c:/mohaa/map_source/tutorial
Now copy the resulting .bsp (in this case tutorial.bsp, should be in the same place as the .map file) to your mohaa/main/maps folder.
Once the .bsp file is in the maps folder it is ready to run. You’ll have to load MOH in developer mode so that you can use the special developer mode tools. Load moh from the run menu or a command line like this.
mohaa +set developer 1 +set thereisnomonkey 1 +set cheats
1 +set ui_console 1
Once in the game you should see the console, it looks like this:
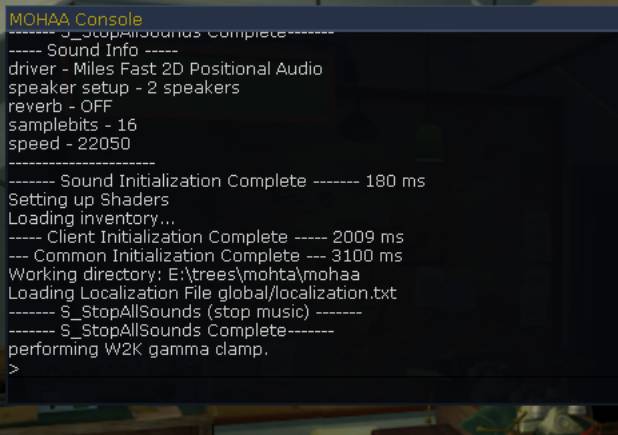
If you don’t see the console press the Tilde (`) key to bring it down.
In the console type “map” followed by a space and then the name of your map, like this:

After pressing enter you will be able to walk around in the room.
These are the basic steps to getting a map up and running in the game. From here you should be able to build a simple map.